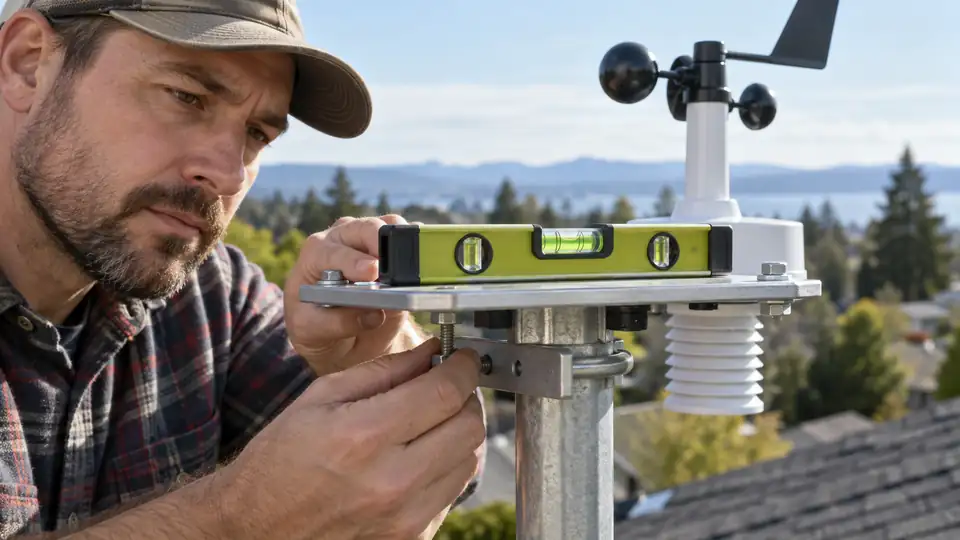
A weather station can be firmly mounted and still report misleading rainfall if its sensor platform tilts. Learning how to level a weather station means getting the rain collector, sensor housing, or mounting surface as close to horizontal as the equipment allows. A small lean may leave one side of a tipping-bucket gauge lower than the other, while a tilted integrated array can also affect sensors such as UV or solar-light instruments, so the adjustment deserves more care than a quick glance suggests.
A level installation matters especially for rainfall measurements. If you are choosing a complete system, our guide to weather stations with rain gauges compares options for tracking precipitation alongside other conditions.
What “Level” Means for a Weather Station
Level means the relevant sensor surface is horizontal from side to side. It is different from making a support pole vertical. A mast can be perfectly plumb while the bracket at its top is tilted, just as a shelf can be level while the wall beneath it is slightly out of alignment. For a rain gauge, the collector rim or housing should sit evenly so precipitation reaches the measuring mechanism without a tilt-related bias.
For an all-in-one sensor array, level the section identified by the manufacturer as the mounting base, sensor body, or rain collector. The anemometer cups and wind vane may sit above that surface and are not themselves usually leveled with a bubble tool. A separate temperature and humidity sensor may have different mounting requirements, so avoid assuming that every component needs the same adjustment.
Before You Adjust the Station
Choose a calm, dry time and make sure the mount is stable before checking the sensor. A loose pole that sways in a breeze can make a level bubble look correct for one moment and wrong the next. If the station is on a roof, ladder, or elevated mast, postpone the work during wet, icy, or windy conditions. A level reading is never worth reaching across an unsafe surface.
Gather a small bubble level, the correct wrench or screwdriver for the mounting hardware, and any model-specific adjustment parts supplied with the station. A short level is often easier to place on a compact sensor housing, while a longer level can reveal tilt in a broader mounting rail. Do not force the housing, drill new holes, or loosen every fastener at once, because the station can shift or fall before the adjustment is complete.
How to Level a Weather Station Step by Step
- Identify the surface that must be level. Look for the rain collector rim, sensor base, mounting plate, or a built-in leveling mark. Many stations have a small bubble level near the mounting point, but its location and purpose vary by model. If the manual names a specific reference surface, use that surface instead of a nearby decorative panel.
- Check the mount before making an adjustment. Confirm that the pole, bracket, or tripod is secure and that the sensor is fully seated. A station resting unevenly on a clamp can appear level until the wind moves it. Check for bent hardware, a loose U-bolt, or a support that has settled into soft soil, then correct that physical problem before fine-tuning the sensor.
- Place the bubble level across the sensor base. Set it on a flat, supported portion of the mounting surface rather than on a curved rain collector or a flexible cover. Read the bubble from a normal viewing angle. If the bubble moves toward one end, that side is higher, so the mount needs a small correction rather than a dramatic twist.
- Adjust the mount gradually. Loosen only the hardware that controls the angle, if the station provides such an adjustment. Raise or lower one side in small increments, then retighten enough to hold the position while you recheck it. Some systems use adjustable brackets or leveling screws. Others have fixed mounting holes, in which case the practical solution may be to correct the support or use an approved mounting method described for that model.
- Check the opposite direction. Rotate the level approximately 90 degrees across the same reference surface and read it again. A base can look level from front to back while still sloping from left to right, much like a picture frame that appears straight until you inspect its other edge. Continue with small adjustments until both directions show a level reading as closely as the equipment and mount allow.
- Tighten the hardware without changing the angle. Hold the bracket or sensor body steady while tightening. If the bubble shifts as the fastener becomes snug, loosen slightly and repeat the adjustment. Tighten according to the model’s instructions, since excessive force can deform plastic parts or damage a mounting clamp even when the station feels more secure.
- Check the station again after installation. Look at the level after the final tightening and inspect the sensor from several angles. A pole should remain stable, cables should not pull against the housing, and the rain collector should be free of leaves or dirt. After the first substantial rainfall, check for signs of water collecting unevenly or splashing from a nearby surface, then reassess the mount if the readings seem unusual.
How Leveling Changes by Sensor Type
| Component | What to level | Why it matters |
|---|---|---|
| Rain gauge | Collector rim, gauge body, or specified leveling surface | A tilt can affect how precipitation reaches the measuring mechanism and can encourage uneven runoff or splash. |
| Integrated sensor array | The base or housing section specified by the manufacturer | One shared platform may carry rainfall, light, or other sensors with different exposure needs. |
| Separate temperature and humidity sensor | The mounting bracket or shield, if the model requires a particular orientation | Leveling alone cannot correct direct sun, heat from a wall, poor ventilation, or other placement problems. |
| Anemometer and wind vane | The mounting arrangement and directional alignment specified for the model | A level base may help the assembly sit correctly, but nearby buildings, trees, and roof turbulence still affect wind readings. |
Rain gauges usually need the most attention because their collection geometry depends on a level opening. Imagine two identical gauges receiving the same shower, with one collector visibly leaning toward a low edge. Water can reach the mechanism differently, especially during intense rain or when runoff and splash are present. Leveling will not fix a blocked funnel, poor exposure, or a gauge beneath an overhanging branch, but it removes one avoidable source of error.
An integrated array creates a more complicated compromise. Raising an anemometer may improve airflow while leaving a rain collector, temperature sensor, or solar sensor in a less suitable position. A level platform helps the shared assembly function as intended, but it does not make every measurement ideal in a cramped yard, beside a roof, or near a wall. Placement and leveling solve different problems, so treat them separately.
What If the Station Cannot Be Leveled?
Some sensor housings have fixed mounting holes and no built-in adjustment. Start by checking whether the pole, wall bracket, or crossarm is the part that is tilted. A slightly skewed bracket may be corrected with compatible hardware or a stable, weather-suitable support method, but the sensor housing should not be modified casually. Drilling into a collector or sealing over openings can interfere with drainage, sensing, or maintenance.
If a permanent installation cannot be brought level, record the limitation and give the rain data appropriate caution. A comparison with a second gauge may reveal a difference, but it does not prove that leveling is the only cause. Different locations, obstructions, exposure, and gauge mechanisms can produce different totals even during the same storm, so avoid adding an offset simply to force the numbers to agree.
Common Leveling Problems
| What you observe | Possible reason | Next check |
|---|---|---|
| The bubble is level in one direction but not the other. | The bracket or support is twisted. | Check the surface at 90 degrees and inspect the mount for uneven tightening or bending. |
| The station becomes tilted after a few days. | The pole, clamp, soil, or mounting surface has shifted. | Check stability and fasteners before readjusting the sensor. |
| Rain totals remain unusual after leveling. | Obstructions, debris, splash, wind effects, or a faulty measuring mechanism may be involved. | Inspect the collector and surrounding exposure rather than changing a calibration offset immediately. |
| The level cannot sit flat on the housing. | The surface is curved, flexible, or unsuitable as a reference. | Use the model’s specified leveling point or check the mounting plate instead. |
A level reading also cannot prove that the sensor is accurate. Leveling is a physical installation adjustment, while calibration involves comparing a measurement with a suitable reference and applying an allowed correction. If a weather app, airport observation, or nearby station shows another rainfall total, first ask whether the instruments experienced the same precipitation and exposure before changing any setting.
Final Checks After Leveling
Once the mount is secure, confirm that the rain collector is unobstructed, the sensor array has not rotated, and the wireless connection still works if the adjustment required moving the unit. A local sensor-to-console radio link is separate from Wi-Fi, so a station can remain level while its console or gateway has an unrelated network problem. Check the readings over several weather events rather than judging the installation from one brief shower.
For an elevated or roof-mounted station, repeat the level check after severe weather or any work near the mount. Do not climb during lightning, strong winds, or slippery conditions, and follow the equipment instructions for access, mounting, and electrical safety. A stable, level sensor gives the measurement system a sound physical starting point, while careful exposure and model-specific setup determine how useful the readings become.