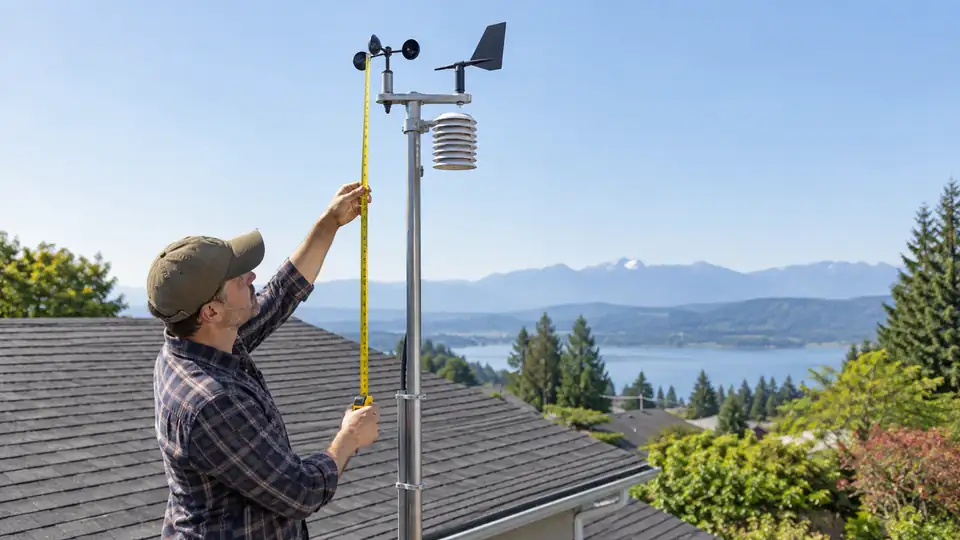
The right mounting height depends on which measurement you want the station to represent. A temperature and humidity sensor usually belongs in open, shaded air roughly 4 to 6 feet above the ground, while an anemometer benefits from being much higher and farther from obstructions. Rain gauges follow another set of placement concerns.
That creates a practical problem for all-in-one weather stations. Their wind, rain, temperature, and humidity sensors share one assembly, yet those measurements do not have identical ideal exposures. A single mounting height can produce a useful home weather record, but it will always involve some compromise.
Typical Mounting Heights for Different Sensors
| Sensor or measurement | Common residential approach | Main reason |
|---|---|---|
| Outdoor temperature and humidity | About 4 to 6 feet above the ground, with shade and ventilation | Reduces heat from soil, pavement, roofs, and walls while keeping readings representative of near-surface air |
| Wind speed and direction | As high and unobstructed as safely practical, often above nearby rooflines or trees | Buildings, fences, trees, and terrain disturb airflow |
| Rainfall | High enough to avoid splash and obstacles, but accessible for leveling and cleaning | Overhangs, branches, runoff, and nearby structures can change the amount collected |
| Integrated sensor array | Follow the exact model instructions, then choose the best overall compromise | One height cannot provide ideal exposure for every built-in sensor |
These are practical ranges rather than universal rules. A station beside a broad lawn may work well at a modest height, while the same station mounted beside a hot wall can report a warmer temperature. A roof-mounted anemometer may receive cleaner wind than a backyard pole, yet roof turbulence can still twist the readings around the roof edges.
Why Height Changes the Readings
Temperature and humidity sensors
Air temperature is easily nudged by nearby surfaces. A sensor above dark asphalt can absorb heat radiated from the pavement, while one beside brick or siding may pick up warmth stored in the wall. A sensor mounted close to the ground can also be affected by soil moisture, grass, snow, and nighttime cooling. Raising it into freely moving air, keeping it shaded, and allowing ventilation usually gives a more representative outdoor reading.
For example, a temperature sensor mounted on the sunny side of a garage may read warmer than a sensor only a few yards away over grass. Increasing the height alone will not fix that exposure problem. The wall, sunlight, and restricted airflow may matter more than the extra foot of pole.
A radiation shield can help protect a temperature and humidity sensor from direct solar heating, but it cannot erase every placement problem. Follow the instructions for the specific shield and sensor, since some arrays use their own protective housing and may not accept an added enclosure.
Wind sensors
Wind changes sharply around structures. Air flowing over a roof can accelerate near an edge, separate into swirling currents, or become turbulent behind a chimney. Trees and fences create similar disturbances. A taller mounting point generally gives an anemometer a clearer exposure, but greater height does not automatically make the entire weather station more accurate.
Picture an all-in-one array mounted on a short pole beside a two-story house. Raising it above the gutter may improve wind readings, but the temperature sensor could then sit closer to hot roofing, and the rain collector may become harder to inspect. The best decision may be a stable location that improves overall data quality without turning routine maintenance into a ladder job.
Formal observing installations may use standardized heights for comparability, especially for wind measurements. A residential station rarely has the same open terrain, mast, access, or clearance. Treat formal standards as context rather than proof that a home station mounted lower is useless.
Rain gauges
Rain gauges need clear exposure and a stable, level mount. Too close to the ground, a collector can receive splash from soil, mulch, or paving. Too close to a roof, wall, tree, or fence, it can miss rain or collect runoff and drips. A tall pole is not automatically better because wind around the pole or nearby structures can cause uneven collection.
A gauge beneath a tree may stay dry for several minutes after rain begins, then receive large drops shaken loose by the branches. A gauge beside a roof edge may collect water that never fell directly into its opening. Neither problem is solved by adjusting the rainfall total afterward.
How High Should an All-in-One Weather Station Be Mounted?
For many home installations, a practical starting point is to place the sensor array so the temperature and humidity portion sits roughly 4 to 6 feet above the surrounding ground, provided the location is shaded, ventilated, and away from artificial heat. This height often balances representative near-ground air with reasonable access for cleaning, battery service, and inspection.
The exact height may need to change if the array contains a prominently exposed anemometer. If wind measurement matters most, a higher and more open mounting point may be preferable. If local temperature and rainfall are the priority, a lower installation in a clear part of the yard may provide more useful overall observations.
Read the mounting instructions for the exact model before choosing a pole or bracket. Hole patterns, clamp sizes, mast diameters, cable routing, sensor orientation, and leveling requirements vary. A pole that looks compatible may not secure the array correctly, and a tilted rain collector can affect rainfall totals even when every electronic function appears normal.
Choosing Between a Yard Pole, Wall, and Roof
Yard or garden pole
A pole in an open part of the property often provides a good compromise for temperature, humidity, and rainfall. Keep the array away from sprinklers, fences, sheds, vehicles, air-conditioning exhaust, and surfaces that store heat. Grass or another natural surface is generally less radiatively intense than concrete or asphalt, although the surrounding property still matters.
A short pole may be easier to reach and less exposed to wind loading. A taller pole may improve the anemometer’s exposure but can sway, require stronger support, and complicate maintenance. Stability matters because movement can affect wind direction, change the collector’s level, and gradually loosen hardware.
Wall mounting
A wall bracket can be convenient, especially where a yard pole is impractical. The wall should be shaded when possible, and the sensor should project far enough to avoid a pocket of stagnant air. Masonry, siding, and concrete can absorb and release heat, so a wall-mounted temperature sensor may be less representative than one in an open yard.
Wall mounting also tends to be a poor choice for wind measurement if the building blocks one or more directions. An anemometer above a wall may still experience roof-edge turbulence. Check the direction the sensor faces and the surrounding structures rather than assuming extra height has solved the obstruction.
Roof mounting
A roof can offer a clear view for wind and may help a radio link between the outdoor array and indoor console. It can also expose the equipment to roof-generated turbulence, heated roofing materials, difficult access, and greater installation risk. Temperature readings may be influenced by the roof, particularly when the sensor is close to the surface or lacks adequate shielding.
Roof installation is best treated as a measurement and safety compromise. Do not work near overhead electrical conductors, install a mast in unsafe weather, or assume that a roof structure can support any bracket or pole. For elevated, structural, or electrical work, follow the equipment documentation and applicable local requirements, and use qualified help where the installation exceeds ordinary safe access.
Height Is Only Part of the Placement Decision
A station mounted at the right height can still produce poor data if the surroundings are wrong. Before fixing the pole or bracket, inspect the proposed location for:
- Direct sunlight on the temperature and humidity sensor
- Walls, roofs, pavement, vehicles, vents, and air-conditioning exhaust
- Trees, fences, chimneys, and buildings that block or disturb wind
- Roof edges, gutters, branches, and other sources of drips or runoff above the rain gauge
- Sprinklers, irrigation overspray, and splash-prone surfaces
- Unstable poles, loose brackets, or a mounting point that cannot remain level
- Access for battery changes, debris removal, and visual inspection
- The communication path between the outdoor sensor and its console or gateway
The last item concerns sensor communication, not automatically Wi-Fi. Many stations use a local wireless radio link from the outdoor array to a console. A Wi-Fi-enabled console or gateway may then connect to the home network for app or Internet features. A high mast can improve exposure while making that local link less reliable if walls, floors, metal, terrain, or distance intervene.
How to Verify the Finished Installation
After mounting the array, check that the pole or bracket is rigid, the rain collector is level, the wind components move freely, and the sensor orientation matches the model instructions. Confirm that the outdoor readings reach the console without repeated gaps. These simple checks catch many installation problems before they are mistaken for sensor failure.
Watch the data across different conditions rather than judging the station from one comparison. A temperature reading may differ from a weather app because the app uses another observation site, forecast source, or measurement height. A nearby airport, shaded backyard, and sunlit roof can all experience different conditions at the same moment.
If one reading seems unusual, first inspect exposure, height, shade, obstructions, leveling, and debris. An offset or calibration change should come later, and only if the model supports it and the reference measurement is genuinely suitable. A station mounted too close to a wall cannot be corrected reliably by changing a temperature setting.
For most residential installations, place an all-in-one array high enough to clear local splash and obstructions, low enough to service safely, and in air that represents the property rather than a roof, wall, driveway, or exhaust outlet. Give the wind sensor as much open exposure as practical, protect the temperature sensor from solar and surface heating, and keep the rain gauge clear, level, and free from overhead interference.