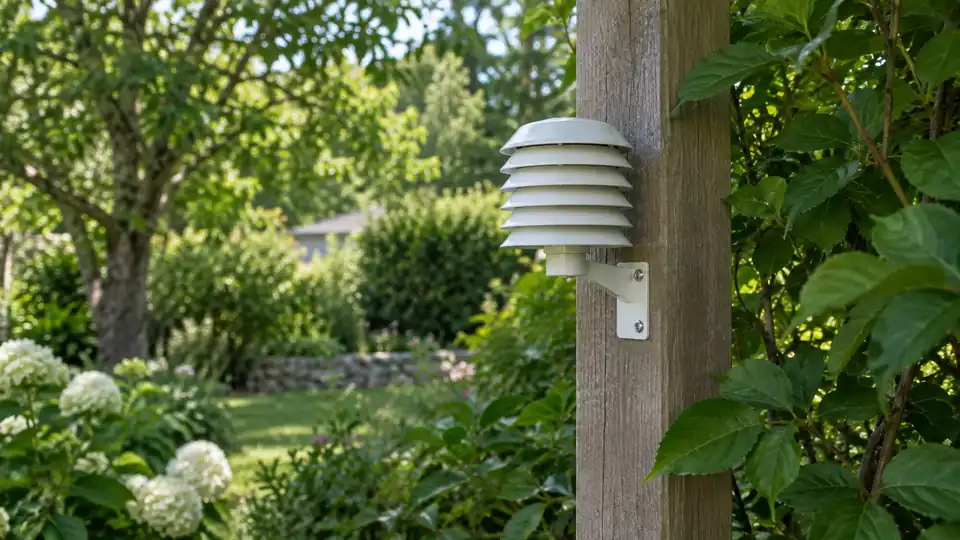
An outdoor temperature sensor can report a perfectly believable number and still be measuring the wrong place. A sensor mounted against a sun-warmed wall may read higher than the surrounding air, while one tucked beneath a roof overhang can stay cooler than an exposed yard. The best location is a shaded, ventilated spot that represents the air around your property, away from surfaces and equipment that add or remove heat.
That principle applies whether the sensor is part of a wireless weather station, a separate thermometer, or a temperature and humidity module. The display, app, and forecast features may vary by model, but the sensor can only report the conditions at its own location, so placement deserves attention before calibration or troubleshooting begins.
Choose a Location That Measures Air, Not a Surface
Outdoor air temperature is different from the temperature of a wall, roof, driveway, fence, or patch of soil. Dark roofing and asphalt absorb sunlight, then release heat into the nearby air. A brick wall can remain warm after sunset, and a concrete patio can create a small pocket of warmer air on a calm evening. Mounting the sensor beside any of these surfaces can produce readings that describe the installation spot rather than the broader outdoor environment.
Picture two sensors on the same property. One sits beside a west-facing wall that bakes through the afternoon, while the other hangs in open shade near a ventilated garden area. Their readings may differ substantially without either sensor being defective. The difference comes from exposure, so moving the sensor can be more useful than changing an offset.
A practical location usually has these characteristics:
- Shade during the part of the day when sunlight is strongest.
- Free movement of air, without placing the sensor in a sealed box or cramped recess.
- Distance from walls, roofs, pavement, vehicles, vents, outdoor appliances, and other heat sources.
- Protection from direct rain where the sensor or its housing requires it.
- Enough access for battery changes, inspection, and cleaning.
Protect the Sensor From Solar Heating
Direct sunlight can heat the sensor body above the surrounding air. This effect can be especially noticeable during calm, sunny weather, when there is little moving air to carry heat away. A sensor that reads correctly in the shade may show an artificially high temperature after several minutes in full sun.
Look for a location that stays naturally shaded throughout the day, such as a north-facing area in the Northern Hemisphere, while checking the actual path of the sun around your building. Seasonal sunlight changes can turn a shaded winter location into a sunny summer location. A balcony that looks protected in the morning may sit in bright afternoon sun, and a tree that provides excellent shade may lose much of its canopy in winter.
A radiation shield can help reduce solar heating while allowing air to reach the sensing element. Use the shield only if it is compatible with the sensor and does not block the openings required for temperature or humidity measurement. A shield does not make a poor location ideal. Warm air trapped near a roof, wall, or enclosed alcove can still distort the reading.
Allow Ventilation Without Creating an Artificial Draft
The sensor needs air exchange, but it does not need a strong, forced airflow. Avoid enclosed sheds, porch corners, tight spaces beneath eaves, and cavities between walls and fences. These spots can hold heat or cool air long after conditions have changed elsewhere.
A location exposed to ordinary outdoor airflow usually gives a more representative result than a sealed recess. At the same time, placing the sensor directly beside an air-conditioning outlet, dryer vent, bathroom exhaust, or heat pump can create a false reading because the airflow itself is warmer or cooler than the surrounding air.
For example, a sensor under a covered porch may avoid direct sun but still sit beside a warm exterior wall. Another sensor mounted near a basement exhaust may receive a steady stream of cooled air. Both locations look sheltered at first glance, yet each creates a small microclimate that can skew the measurement.
Keep Heat Sources and Reflective Surfaces at a Distance
Inspect the area around the proposed mounting point during different parts of the day. Nearby influences may include:
- Exterior walls, especially masonry or dark-colored walls.
- Roofs, gutters, chimneys, and attic vents.
- Driveways, sidewalks, patios, and other paved surfaces.
- Cars, grills, generators, pool equipment, and outdoor lighting.
- Air-conditioning units, heat pumps, dryer outlets, and exhaust fans.
- Fences or dense vegetation that restrict air movement.
Vegetation requires a little judgment. A tree canopy may provide useful shade, but dense leaves can restrict ventilation and wet the sensor after rain. A bare branch may be harmless in winter and offer little protection in summer. A sensor mounted among shrubs may also experience conditions different from those in the open yard, especially on still nights.
Ground cover matters too. A sensor close to grass may reflect a cooler, moister microclimate than one above a broad paved area. Neither reading is automatically wrong. The better location depends on what you want to monitor, but a sensor intended to represent general outdoor air should avoid strong influence from any single surface.
How High Should an Outdoor Temperature Sensor Be?
There is no single mounting height that suits every home, sensor, and purpose. Formal observing sites use standardized exposure to make measurements comparable, while residential installations must also account for trees, buildings, wireless communication, safety, and maintenance.
For a home sensor, aim for a height that keeps it above immediate ground effects while remaining in a shaded, ventilated air mass. Avoid placing it directly over bare soil, mulch, concrete, or a roof. A sensor mounted very close to the ground can be strongly affected by surface heating and nighttime cooling. A sensor mounted high on a roof may gain exposure but encounter roof heat and turbulent airflow.
Suppose a homeowner wants readings for a backyard garden. A shaded, ventilated location near the garden may be more useful than a high rooftop sensor that measures air influenced by roofing materials. Someone comparing readings with a regional weather report may prefer a more open location that reduces local heat sources. The purpose of the measurement helps determine which compromise makes sense.
Where to Place a Temperature and Humidity Sensor
Temperature and humidity sensors often share one housing, so their placement needs to support both measurements. Humidity is relative to temperature, which means heat from sunlight or a nearby wall can affect the displayed relative humidity as well as the temperature reading. A warm pocket beside a building may therefore create two misleading values at once.
Keep the sensor away from irrigation spray, dripping gutters, standing water, and locations where condensation remains trapped. Outdoor humidity sensors need exposure to ambient air, but their housing and environmental limits vary by model. Follow the manual for any requirements involving a shield, enclosure, orientation, or protection from precipitation.
A shaded wall-mounted position may work well if the wall does not radiate excessive heat and air can circulate around the sensor. A sheltered post or pole can offer better separation from the building, provided the mount is stable and the sensor remains accessible. The small details matter more than the label “outdoor” on the packaging.
Mounting on a House, Fence, or Roof
House walls and fences
A wall is convenient, but it can transfer or radiate heat into the sensor. If the only practical choice is a wall, favor a shaded side with open air around the sensor and use the manufacturer’s mounting hardware or spacing guidance. A fence may reduce building influence, yet a solid fence can still block airflow or become hot in sunlight.
A sensor fastened to a west-facing fence may climb in temperature during late afternoon as the boards release stored heat. A sensor on the shaded side of a detached structure may perform better, provided the structure does not trap warm air. Check the location at different times rather than judging it from one visit.
Roofs and elevated mounts
Roof mounting can provide open exposure and may improve wireless communication, but it introduces trade-offs. Roofing materials can heat nearby air, roof edges can produce turbulence, and maintenance becomes more difficult. These effects are especially relevant to temperature readings, even though a roof may appear attractive for gaining height.
An elevated mast or roof installation also raises practical safety questions involving ladders, slippery surfaces, electrical conductors, structural mounting, and lightning-related requirements. Follow the sensor and mounting-system documentation, along with applicable local requirements. Difficult roof or mast work may call for professional assistance rather than an improvised bracket.
Check Wireless Communication After Choosing the Site
A thermally good location is useful only if the sensor can communicate reliably with the console, gateway, or receiver. Wireless sensor communication is separate from Wi-Fi. A sensor may send readings successfully to a local console even when the console has no Internet connection, while a Wi-Fi-enabled console may reach the router poorly from another room.
Before permanently fastening the sensor, place it at the proposed location and check whether readings arrive consistently. Walls, floors, metal siding, reinforced construction, trees, terrain, and the design of the equipment can affect the link. If communication fails, move the console or sensor slightly before abandoning the better measurement location, provided the model allows that arrangement.
A location with perfect signal strength beside a sun-heated wall is still a poor temperature site. Conversely, a well-shaded position that communicates intermittently may need a small adjustment in receiver placement. Measurement exposure and communication reliability must be solved together.
Verify the Finished Placement
After mounting the sensor, give it time to settle and observe its readings across sunny, cloudy, windy, and calm conditions. Compare the pattern with nearby conditions rather than expecting an exact match with an app, airport, or another station. Different measurement heights and exposures can produce genuine differences.
Look for warning signs such as a sharp temperature rise whenever sunlight reaches the sensor, unusually slow cooling after sunset, readings that change when a nearby appliance operates, or humidity values that remain strange in otherwise ordinary conditions. These patterns point toward placement or ventilation problems before they prove a hardware fault.
If the reading seems wrong, inspect the sensor location first. Check for new shade changes, a blocked shield, nearby construction, vegetation growth, loose mounting, debris, or a shifted console. Calibration offsets should come later, and only after the sensor has been compared under similar exposure with a suitable reference and the model supports that adjustment.