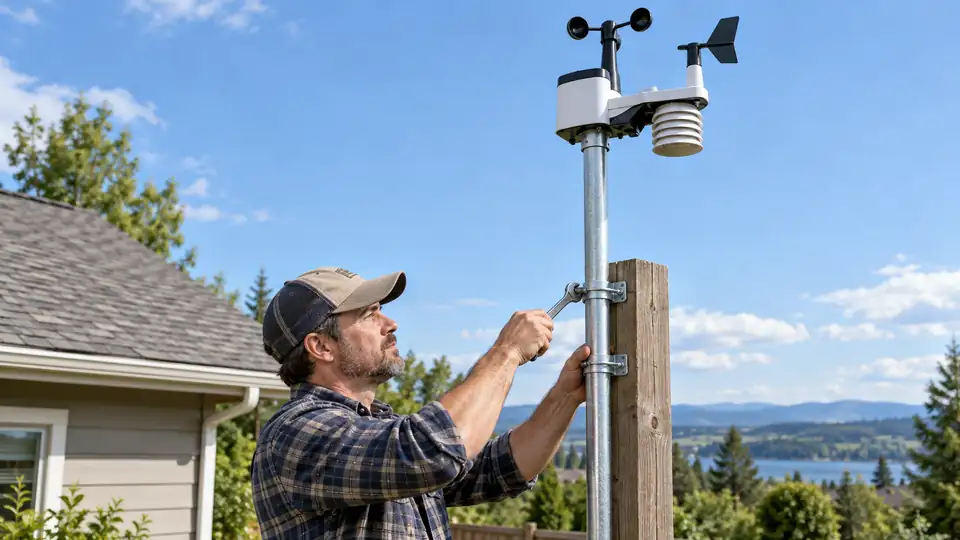
How to mount a weather station starts with a simple question: which measurement are you trying to represent? A sensor array beside a hot wall may report inflated temperatures, while an anemometer tucked behind a roof edge can make a breezy yard look strangely calm. The mounting hardware may be secure in both cases, yet the readings can still miss the conditions you care about.
A good installation balances exposure, stability, communication, access, and safety. Integrated arrays often force compromises because wind, rain, temperature, and humidity do not share exactly the same ideal location. The steps below help you make those compromises deliberately rather than mounting the station wherever a bracket happens to fit.
Still choosing a station? Our guides to weather stations with anemometers and weather stations with rain gauges compare systems for wind and rainfall monitoring.
Plan the Mounting Location Before Drilling
Walk around the property with the station’s measurements in mind. Look for a location with open airflow, limited artificial heat, a clear view of the sky where applicable, and enough room to inspect the equipment later. A backyard fence may seem convenient, but it can disturb wind flow. A sunny wall may offer an easy mounting surface, yet the wall can store and radiate heat into a temperature sensor.
Picture two common installations. One sensor sits above dark roofing and reports warmer air during sunny afternoons because the roof heats beneath it. Another is mounted beside an air-conditioning exhaust and shows sharp temperature and humidity changes whenever the equipment runs. Neither issue is necessarily an electronic fault. The surrounding environment is influencing the measurement before the signal ever reaches the console.
- Keep temperature and humidity sensors away from walls, roofs, pavement, vents, vehicle parking areas, and other artificial heat sources.
- Give the rain collector a clear exposure and protect it from overhanging branches, roof runoff, splashing, and falling debris.
- Place the anemometer where buildings, trees, fences, roof edges, and terrain create as little blockage and turbulence as practical.
- Choose a mounting point that remains reachable for cleaning, battery service, inspection, and seasonal checks.
- Check the expected wireless path between the outdoor sensor and the console or gateway. Walls, floors, metal structures, trees, and terrain can affect communication.
Formal observing sites aim for standardized exposure and comparability. A home installation may have less space and more obstacles, so the best practical location may still involve trade-offs. Record those limitations rather than treating a compromised position as perfect.
Check the Station and Mounting Hardware
Read the manual for the exact model before assembling anything. Pole diameter, clamp style, mounting holes, sensor orientation, power arrangement, and pairing procedures vary among stations. A bracket that fits one brand or generation may not fit another, and a replacement sensor from the same brand may use a different mounting or communication system.
Lay out the array, mast, clamps, screws, washers, tools, batteries, and any model-specific parts at ground level. This is the moment to notice a missing fastener, an unclear orientation mark, or a solar panel that needs a particular angle. Discovering those details on a ladder is a poor bargain.
Inspect the sensors before installation. Confirm that the rain collector is clear, the wind cups or propeller turn freely, and the wind vane moves without rubbing. Do not add oil, drill openings, enlarge mounting holes, or modify a radiation shield unless the documentation specifically supports that action. Small changes can alter airflow, water collection, or sensor protection.
Mount the Weather Station Step by Step
1. Assemble the sensor array on the ground
Build as much of the outdoor unit as possible at a safe working height. Install the batteries or power components according to the manual, and check that covers and seals are seated correctly. If the system has an outdoor array, indoor console, and separate gateway, identify which component communicates with which. A local radio link between the array and console is different from Wi-Fi between a console or gateway and a router.
At this stage, check orientation marks and moving parts. For example, a wind vane may need alignment with a stated direction, while a rain gauge must sit level. A tilted collector can produce a measurement problem even if the station reports data normally.
2. Install the mast, bracket, or support
Secure the support to a suitable structure using hardware compatible with the surface and the station’s mounting system. A pole, wall bracket, fence post, tripod, or roof mount each presents different structural and exposure issues. Do not assume a general-purpose pole has the correct diameter or capacity for the array.
The support should remain rigid when the wind moves through the property. If the mast wobbles, the wind sensor can shift position, the rain collector can tilt, and long-term vibration can loosen fasteners. A mount that feels solid by hand may behave differently in strong gusts, so inspect the connection points and follow the hardware instructions closely.
Stay clear of overhead electrical conductors, and avoid working on a roof or elevated mast during wind, rain, ice, or nearby thunderstorms. Roof work, structural attachment, wiring, grounding, and lightning protection can involve hazards and local requirements beyond a basic sensor installation. Professional help may be appropriate for difficult or exposed locations.
3. Attach the array and set its orientation
Place the sensor array on the support without forcing clamps or screws. Tighten the fasteners evenly, then check that the unit remains aligned as you finish. The exact orientation procedure depends on the model. Some systems use a compass direction or a marked reference, while others require an electronic setting or a specific installation position.
Keep the rain collector level. Look at it from more than one angle, because a slight tilt can be difficult to spot from directly beside the unit. Check that nothing above it can drop leaves, water, or other debris into the opening. A nearby roof edge can create runoff and splash, while a tree can intercept or redirect precipitation before it reaches the collector.
Make sure the anemometer has room to rotate and that the wind vane can move freely. A fence, chimney, tree, roof ridge, or neighboring structure may create turbulence even when the sensor appears exposed. Raising the array can improve wind exposure while making temperature and rain measurements more vulnerable to other placement compromises, so do not assume that higher automatically improves every channel.
4. Secure cables and complete the power setup
For a wired component, leave enough slack for inspection without allowing the cable to flap, rub against sharp edges, or collect water at a connection. Use compatible fastening methods and keep connectors protected as specified by the manufacturer. For solar-assisted equipment, remember that the panel may power or assist only one part of the system, and batteries may still be required.
Do not describe an outdoor station as fully solar-powered unless the model documentation supports that description. The outdoor array, console, gateway, and optional sensors can have separate power arrangements. Install the recommended power source for each component and check polarity carefully.
5. Pair the sensor and test communication
Turn on the outdoor unit and console or gateway in the order described by the manual. Look for a current outdoor reading rather than relying on a single initial display. Temperature, humidity, wind, and rainfall channels may update differently, and some systems require a pairing or channel-selection procedure.
If the outdoor array works beside the console but fails after the console moves indoors, the issue may be distance or building materials rather than a dead sensor. If the sensor link is stable but remote access fails, the problem may involve Wi-Fi, the router, an account, or a cloud service. Those are separate connections and need separate checks.
Handle the Main Sensor Trade-Offs
Temperature and humidity
These sensors need representative air exposure, shade from direct solar heating, and enough ventilation for air to move around the sensing area. A shaded location can still be poor if it sits against a warm wall or above sun-heated pavement. An enclosure or radiation shield may help when it is supplied or supported by the equipment, but it does not make every location representative.
For example, a sensor mounted under a broad overhang may avoid direct sun but receive little airflow. Another placed in open air may ventilate well yet be heated by a nearby masonry wall. Compare the surroundings throughout the day, not only during the cool part of installation.
Rainfall
Rain gauges need an unobstructed collector, a level mounting surface, and protection from splash and runoff. Leaves, seeds, insects, and roof debris can block the funnel or interfere with the measuring mechanism. Clean the collector according to the manual, and avoid assuming that a standard home rain gauge measures snow, sleet, or hail accurately.
A gauge near a wall may catch less rain from one direction, while a gauge beneath a tree may receive drops delayed from the canopy. A location that stays dry during a shower is not necessarily protected. It may simply be shielded from the precipitation the instrument is meant to measure.
Wind
Wind readings are especially sensitive to obstructions and turbulence. Buildings, trees, fences, roof geometry, and nearby terrain can slow, redirect, or swirl the airflow. An exposed mast may provide more useful wind data, but it can also be harder to reach and more demanding to secure.
An all-in-one array creates a practical compromise. Moving it higher may help the anemometer while making access harder and increasing exposure to structural movement. Moving it closer to a sheltered part of the property may simplify maintenance while reducing wind quality. Choose the position based on the measurement you value most, then document the limitation.
Roof and Wall Mounting Require Extra Judgment
A roof can provide elevation and open airflow, but roof surfaces can also heat nearby temperature sensors, create turbulence around edges and ridges, and make maintenance hazardous. A roof installation does not guarantee accurate wind readings, and roof heat does not automatically invalidate temperature data. The effect depends on sensor design, height above the surface, airflow, shading, and the roof’s surroundings.
Wall mounting is often easier to access, though the wall can obstruct wind and influence temperature. A north-facing wall is not automatically ideal, and a shaded wall may still be warmed by the building or nearby equipment. Check the full environment around the proposed bracket rather than judging the surface by direction alone.
For elevated, structural, or electrically involved installations, follow the station documentation and applicable local requirements. Grounding, surge protection, mast bonding, and lightning protection are separate issues, and grounding alone should not be treated as a guarantee against lightning damage.
Verify the Finished Installation
After mounting, walk through a short inspection before trusting the readings:
- Confirm that the mast or bracket does not move excessively and that fasteners are secure.
- Check that the rain collector is level and free of packing material or debris.
- Spin the anemometer gently and confirm that the wind vane moves without contact.
- Make sure the temperature and humidity sensor has airflow and is clear of artificial heat sources.
- Confirm that cables, covers, battery compartments, and connectors are installed as specified.
- Verify that the outdoor array communicates reliably from its normal console or gateway location.
- Compare the displayed wind direction with the physical orientation and model instructions.
- Record the mounting location, sensor height, nearby obstructions, and any deliberate compromises.
Watch the readings through changing conditions rather than judging the installation from one moment. A temperature that seems high during sunshine may reflect radiant heating, while a low wind value during a breezy period may point to obstruction. If one channel looks implausible, inspect its exposure and mechanism before changing calibration settings or replacing hardware.
When the station is stable, accessible, and communicating normally, leave the calibration and offset settings alone unless a suitable reference and the model’s instructions support an adjustment. A nearby app, airport, or second sensor may be measuring a different location, height, exposure, or pressure convention. The mount should be corrected first whenever the physical installation offers a plausible explanation.