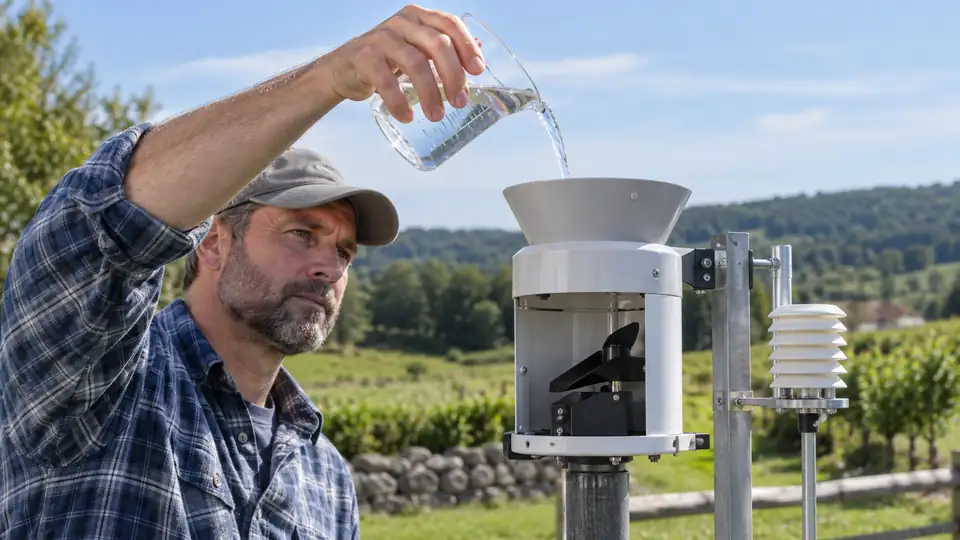
A rain gauge that reports less rain than a nearby station may need calibration, but the difference does not automatically prove the sensor is wrong. A gauge under a tree, beside a wall, or tilted slightly can collect a different amount from a properly exposed reference. Learning how to calibrate a weather station rain gauge starts with separating a true measurement error from a placement or comparison problem.
What Rain Gauge Calibration Actually Means
Most personal weather stations use a tipping-bucket rain gauge. Water enters a collector, fills a small bucket, and tips it after reaching a specified volume. Each tip becomes a small increment of recorded rainfall. Other designs may use a weighing mechanism or a different electronic method, so the calibration procedure depends on the model.
Calibration checks whether the gauge converts collected water into rainfall correctly. An adjustment may involve changing a rainfall factor, resolution setting, or correction value in the console or app. Some stations provide this option, while others allow only cleaning, leveling, and verification. A display that reports rainfall in hundredths of an inch may have fine resolution without having the same level of accuracy.
Imagine two gauges on opposite sides of a house. One sits in an open area, while the other is close to a fence that interrupts wind-driven rain. Their totals can differ without either sensor having an electronic fault. A second example is a gauge that matches a reference during gentle rain but reports less during a cloudburst. That pattern can point toward flow rate, splashing, blockage, or tipping-bucket behavior rather than a simple offset.
Check the Installation Before Adjusting Anything
Calibration cannot correct a poor collection site. Place the gauge where rain can fall into the collector freely, with no overhanging branches, roof edges, gutters, walls, or nearby objects that can block precipitation or shed water into it. Keep the collector level, since a tilted tipping-bucket mechanism can change the amount needed to trigger a tip.
Look for three common physical problems:
- Debris: Leaves, seeds, insects, and dirt can restrict the funnel or interfere with the tipping mechanism.
- Splash and runoff: Water bouncing from pavement, roofs, fences, or mounting surfaces can enter the collector and inflate totals.
- Obstruction: Trees and structures can reduce or redirect rainfall reaching the gauge, especially during windy storms.
Clean the collector using the method permitted by the manufacturer. Avoid forcing the tipping mechanism, altering the funnel opening, applying oil, or using solvents without model-specific guidance. A homeowner who finds a few pine needles in the funnel should clear them before changing a software offset. Someone with a gauge mounted against a wall should improve the exposure first, because a correction made for that location may fail after relocation.
Choose a Suitable Reference
A meaningful comparison requires a reference that measures the same rainfall at nearly the same place and time. A properly installed manual rain gauge with a clearly marked volume scale can work for a home check. A nearby official station or airport observation may be useful for broad context, but it may be several miles away, at a different elevation, or exposed to different wind and terrain.
Do not use a coffee cup, bucket, plant saucer, or other open container as a precision reference. Its shape, evaporation, splash, and exposed surface make the collected amount difficult to interpret. A weather app also may display data from a regional station or forecast model rather than rainfall measured at your property.
For example, a personal gauge can record a heavy shower that misses a nearby airport entirely. In another case, a station across town may receive rain from a storm cell while your yard stays dry. Those are real differences in precipitation, not calibration evidence, so a controlled test is more useful than comparing unrelated storm totals.
How to Perform a Controlled Rain Gauge Test
Check the manual before starting. Look for the collector opening dimensions, the rainfall increment represented by one tip, and any supported calibration setting. The exact test volume depends on the gauge design, so there is no universal amount of water that applies to every model.
- Inspect and level the gauge. Remove visible debris, confirm that the collector is secure, and use a small level if the design allows it. Make sure the outdoor sensor has stable power and is communicating with the console or app.
- Record the starting total. Write down the rainfall reading before the test. If the system stores daily, monthly, and total records separately, identify which value you are watching.
- Measure a known amount of water. Use a graduated cylinder, laboratory-style measuring vessel, or another container with clear markings. The volume must be suitable for the collector and specified by the model instructions.
- Deliver the water gradually. Pour or release it into the collector at a slow, steady rate. A sudden stream can overwhelm the funnel, create splash, or move through a tipping bucket faster than normal rainfall.
- Wait for the gauge to register. Give the mechanism time to drain and transmit the result. Watch for the expected number of tips or the corresponding increase in the displayed rainfall.
- Repeat the test if needed. A single tip can be affected by timing, residual water, or the gauge’s resolution. Several controlled trials may reveal whether the result is consistently high, consistently low, or erratic.
Use the model’s instructions to calculate the expected rainfall from the test volume. The basic relationship is:
Rainfall depth = water volume ÷ collector opening area
Use matching units throughout the calculation. If volume is measured in cubic inches and the collector area is in square inches, the result is in inches of rainfall. For metric units, use cubic centimeters and square centimeters to obtain centimeters, then convert if required. A manufacturer may already provide a test volume that avoids this calculation.
A practical example helps show why the rate matters. If a measured sample is released in a fast gush, the gauge may record a different result from the same sample delivered slowly. If the gauge is tested with a small amount near its display resolution, rounding can hide a modest difference. A larger model-approved test and repeated trials provide a clearer signal without pretending to produce laboratory-grade certainty.
Adjust the Gauge Only If the Results Support It
If the controlled test shows a consistent difference, check whether the station supports a rainfall calibration factor or offset. The control may be located in the console, app, gateway, or sensor configuration, and the wording varies by model. Follow the exact instructions for the station rather than guessing at a menu path or entering an invented correction value.
Some systems let you adjust a multiplier. Others use a fixed correction, and some provide no user calibration at all. A multiplier changes future readings according to the measured relationship. A fixed offset may be unsuitable for rainfall because the error can grow with the amount of precipitation. The manual should determine which type of adjustment the equipment supports.
Keep a written record of the original setting, test volume, observed result, date, and any change made. If the adjustment makes the gauge match one test but causes disagreement during later storms, restore the original value and inspect the installation again. A gauge that reads low only during intense rainfall may have a flow or tipping issue, while a gauge that varies randomly may have contamination, mechanical damage, power trouble, or communication loss.
Verify the Result in Real Rain
A controlled test confirms the gauge’s response to a known volume, but outdoor verification shows how the complete installation behaves. Compare the station with a suitable manual reference placed nearby and exposed independently. Record the beginning and ending totals for the same rainfall event rather than comparing daily totals that may include different start times.
Pay attention to rainfall type and intensity. Gentle, steady rain may produce a different result from wind-driven showers, hail, or a short cloudburst. Standard personal rain gauges may also be unsuitable for measuring snow, sleet, or other frozen precipitation unless the model specifically supports those conditions. Do not treat a snow depth reading as an automatic liquid-equivalent rainfall measurement.
Suppose the electronic gauge and manual reference agree across several moderate events but diverge during strong wind. That points toward exposure, splash, or wind effects before it points toward a software setting. If they disagree by a similar proportion in calm and varied rain, a calibration factor or collector geometry may deserve closer attention.
Rain Gauge Calibration Troubleshooting
| Observed symptom | Possible explanation | What to check next |
|---|---|---|
| No rainfall is recorded | Blocked funnel, stuck tipping mechanism, power issue, or no qualifying precipitation at the sensor | Inspect the collector, confirm sensor power and communication, and test with a model-approved measured volume |
| The total is consistently low | Incorrect calibration factor, tilted gauge, restricted flow, poor exposure, or rapid rainfall exceeding the mechanism’s response | Level and clean the gauge, review the model setting, and compare controlled tests with slow and consistent delivery |
| The total is consistently high | Splash, runoff from a nearby surface, excessive water entering from a structure, or an incorrect adjustment | Check the surrounding area and collector edges, then review the original calibration setting |
| Readings vary from one storm to another | Wind, storm intensity, debris, intermittent communication, or changing environmental exposure | Compare event conditions, inspect the mechanism, and verify that the displayed total is updating reliably |
| The gauge matches a reference but differs from an app | The app may use data from another location or a different reporting interval | Compare with a nearby physical reference during the same event instead of using the app as the calibration standard |
Do not repeatedly reset or re-pair the station while investigating a rainfall error. A reset can affect pairing, historical data, time settings, or calibration values, depending on the equipment. Start with observation, cleaning, leveling, power, and reference quality. If the mechanism remains erratic after those checks, contact the manufacturer or replace the component only after confirming compatibility with the exact station model.
When Calibration Is Not the Right Fix
A calibration adjustment is a poor substitute for a gauge installed beneath a tree, beside a roof edge, or on an unstable mount. It is also a poor response to a comparison with a distant weather station. The sensor may be accurately reporting conditions at its own location while the reference represents somewhere else.
Stop adjusting and reassess the setup if the test results change after cleaning, if the gauge behaves differently at different flow rates, or if the readings are intermittent rather than consistently offset. Those clues point toward blockage, mechanical wear, sensor communication, or environmental exposure. A stable installation and a repeatable controlled test give you a defensible basis for any model-supported correction.