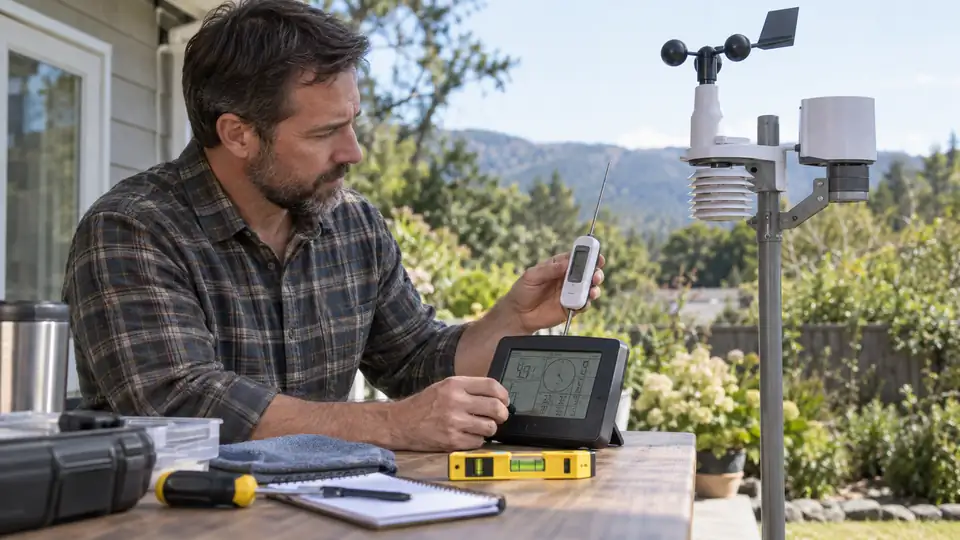
A weather station that reads differently from a phone app does not automatically need calibration. The two systems may be measuring at different locations, elevations, times, or pressure references. Before changing an offset, first determine whether the sensor is wrong or whether the comparison is unfair.
Learning how to calibrate a weather station starts with that distinction. Calibration is an adjustment made against a suitable reference. Verification is the process of checking whether a reading agrees with a trustworthy reference under comparable conditions. Placement, exposure, stabilization time, sensor response, and the station’s own settings all matter.
Calibration, adjustment, and verification are different tasks
A station may display a temperature from an outdoor sensor, calculate dew point from temperature and humidity, and show a forecast icon based partly on pressure trends. Only the first readings come directly from physical sensors. Changing a temperature offset will not correct a calculated dew point if the underlying humidity reading or formula is the real source of the difference.
Suppose an outdoor sensor near a sunny wall reads warmer than a shaded reference. That may be a placement problem rather than a failed sensor. Likewise, a home barometer may differ from an airport report because one value is station pressure and the other is adjusted to sea-level pressure. Calibration should follow diagnosis, not replace it.
| Term | What it means | Typical action |
|---|---|---|
| Verification | Checking a reading against a suitable reference | Compare conditions, location, timing, and exposure |
| Calibration | Establishing how closely an instrument agrees with a reference | Use a reference with known or documented performance |
| Adjustment | Changing an offset or setting to correct a persistent difference | Use the model’s supported calibration control |
| Correction | Applying a known difference when interpreting or recording data | Document the correction and its conditions |
Prepare the station before checking accuracy
Read the manual for the exact model before opening a calibration menu. Some stations provide user offsets for temperature, humidity, pressure, rainfall, or wind. Others restrict calibration to certain measurements, and some provide no user adjustment at all. Menu names, limits, reset behavior, and whether an offset survives a battery change can vary.
Gather a suitable reference for the measurement you want to check. A reference thermometer should be appropriate for outdoor air temperature, rather than a surface thermometer intended for cooking or household objects. A reference hygrometer should be treated cautiously because inexpensive humidity instruments can disagree substantially, especially at very high or very low humidity.
For a useful comparison, place the reference and station sensor close enough to experience nearly the same air while keeping both instruments exposed correctly. A reference sitting indoors beside an open window is not a fair comparison with a sensor mounted in full sun outdoors. A handheld instrument held in your warm hand can also drift, making a small difference look more meaningful than it is.
- Check that the station has stable power and a current time.
- Inspect the sensor for dirt, insects, blocked openings, or physical damage.
- Confirm that the outdoor sensor is communicating normally.
- Allow both instruments to sit in the comparison location long enough for their readings to settle.
- Record the date, time, readings, location, shade, wind, and other conditions.
- Check whether the station is displaying a direct measurement or a calculated value.
How to calibrate a weather station step by step
- Choose one measurement to investigate. Start with the reading that appears wrong, such as outdoor temperature, relative humidity, barometric pressure, rainfall, or wind speed. Avoid changing several offsets at once because you will lose track of which adjustment affected the result.
- Check the sensor’s exposure. Look for direct sunlight, heat from a wall or roof, nearby pavement, HVAC exhaust, vents, vehicles, dense vegetation, or restricted airflow. A temperature sensor inside a radiation shield can behave differently from a bare sensor. A rain gauge beneath a tree or beside a wall can collect a different amount of precipitation than an exposed gauge.
- Place the reference and station sensor in comparable conditions. Keep the instruments at similar height where practical, away from artificial heat, and protected from direct solar heating when the measurement requires shaded air exposure. Do not move a delicate outdoor sensor repeatedly if doing so could disturb its mounting or expose it to damage.
- Allow the readings to stabilize. Temperature and humidity can change rapidly as sunlight, wind, and cloud cover shift. A reference moved from indoors may need time to reach outdoor conditions. Comparing one quick display reading with one handheld reading can produce a false discrepancy.
- Record several observations. Write down both readings at more than one point in time. A steady difference under similar conditions is more useful than a single comparison made during a sudden weather change. If the difference grows or disappears as the environment changes, placement or response time may be involved.
- Check the reference and pressure convention. For pressure, identify whether the station shows absolute or station pressure, relative pressure, or sea-level pressure. A weather app may show an adjusted value that cannot be compared directly with the raw pressure measured at the sensor’s elevation.
- Apply an adjustment only when the difference is persistent and understood. If the model supports an offset and the comparison supports a correction, enter the change exactly as described in the manual. Do not invent an offset value or assume that a setting labeled “calibration” affects every sensor.
- Repeat the comparison after the adjustment. Check the same measurement again under comparable conditions. Record the original reading, the adjustment, the reference value, and the result so a later change can be reversed or reassessed.
Temperature and humidity calibration
Outdoor temperature is often the easiest measurement to verify, but it is highly sensitive to exposure. A sensor beside a sun-warmed wall may read high during the afternoon and appear accurate after sunset. A sensor in a windy, open location may respond more quickly than a shaded reference inside a protective enclosure, so timing matters as much as the displayed number.
Humidity deserves more caution. Relative humidity changes as temperature changes, so two sensors at slightly different temperatures can report different humidity values even when the surrounding air is similar. If a temperature offset is changed, derived readings such as dew point may change as well. Check the model’s documentation before adjusting humidity independently.
A reading that remains high beside a roof, air-conditioning outlet, or paved surface should prompt a placement correction before an electronic offset. For example, moving the sensor to a better ventilated, representative location may improve both temperature and humidity without changing a single menu setting.
Rainfall and wind require measurement-specific checks
Rain gauge verification
Rainfall cannot be checked fairly by comparing a home gauge with a distant airport, neighbor, or weather app. Rain varies across short distances, and nearby roofs, trees, fences, and walls can alter what reaches the collector. Splash from a hard surface can inflate a total, while overhanging vegetation can block or redirect precipitation.
First inspect the collector for leaves, insects, dirt, and standing water. Confirm that the gauge is level and that its moving mechanism is unobstructed. If the model supports a controlled calibration procedure, follow the manufacturer’s instructions closely. The correct liquid volume, delivery rate, access point, and menu setting depend on the gauge design, so a generic procedure may create a new error.
Keep liquid rainfall separate from frozen precipitation. A standard home rain gauge may not measure snow, sleet, or hail accurately unless the equipment specifically supports those conditions. A rainfall total after a snow event should not automatically be treated as a calibrated liquid-equivalent measurement.
Anemometer verification
Wind is difficult to compare because airflow changes around buildings, trees, fences, roofs, and terrain. An anemometer on one side of a house may experience turbulent air while a handheld meter in an open area samples something else. A different wind direction can change both instruments’ exposure within seconds.
Inspect the cups, propeller, or wind vane for dirt, ice, damage, or binding. Make sure the assembly can move freely without adding oil or lubricant unless the manual specifically permits it. Compare readings only with a suitable reference and under steady airflow. A station’s wind measurement range also says nothing by itself about how much wind its mounting hardware can safely withstand.
Barometric pressure needs the correct reference
Pressure calibration often goes wrong because the numbers use different reference conventions. Station pressure represents the pressure at the sensor’s elevation. Sea-level pressure is adjusted to a common reference elevation, while pressure trend describes how the value has changed over time. These are related, but they are not interchangeable.
If a station differs from a weather app, identify the app’s data source and pressure type before changing anything. A nearby service may report an observation from a different elevation, while the app may display a regional or adjusted value. Changing the station’s pressure offset simply to match that number can make the local reading less meaningful.
Use a suitable pressure reference at a comparable elevation when one is available, and follow the model’s instructions for entering elevation or relative-pressure settings. An incorrect elevation setting can look like a sensor calibration problem, so verify configuration first.
What to do when the station still disagrees
A persistent difference does not prove that the sensor has failed. Work through the simplest explanations before replacing hardware or performing a factory reset. A reset may erase pairing, Wi-Fi credentials, alerts, offsets, clock settings, or stored information, depending on the model.
| Observed problem | Possible explanation | Next check |
|---|---|---|
| Temperature is consistently high | Sunlight, a warm wall, roof heat, or restricted airflow | Improve exposure, then repeat the comparison |
| Humidity changes sharply | Temperature difference, sensor response, or changing airflow | Compare temperature and humidity together under stable conditions |
| Pressure differs from an app | Different pressure reference, elevation, or data source | Identify station, relative, and sea-level pressure settings |
| Rainfall is low or absent | Blocked collector, poor exposure, tilt, or qualifying precipitation did not reach the gauge | Inspect, level, clean according to the manual, and verify communication |
| Wind appears low or erratic | Obstruction, turbulence, stuck moving parts, or changing airflow | Inspect the anemometer and review its exposure |
| One reading is missing | Sensor channel, battery, communication, or component-specific issue | Check power, pairing, channel settings, and the sensor itself |
If the sensor remains outside its published specifications after placement, configuration, and reference checks, contact the manufacturer or consult the exact service documentation. Keep your comparison notes. They provide far more useful evidence than repeatedly changing offsets and hoping the display settles down.
Keep a calibration record
Write down the sensor, reference instrument, location, conditions, original reading, adjustment, and post-adjustment result. A temperature offset that seems correct on a calm, cloudy day may be unsuitable in direct sun, and a pressure setting may change after the station’s elevation or display mode is reconfigured.
After maintenance, battery replacement, sensor relocation, or a reset, verify communication and review the offsets again. If the station provides history, preserve important data before making major configuration changes. A short record turns calibration from guesswork into a repeatable check, especially when the same disagreement returns months later.